

If you have a WAN connection at your home that you wish you could use while you’re traveling, then Peplink’s SpeedFusion Connect Relay is the solution. As long as your hardware is running firmware 8.2 or higher, this allows you to connect your mobile Peplink router to your home Peplink router and use its Internet connection to connect to the Internet. This essentially makes it look like you’re at home rather than connected through the mobile network or VPN connection you’re using. So, it might allow you to connect to things like streaming services more easily.
To learn how to set this up on your own, check out our video at YouTube. You may also follow the steps below.
Configuring the Relay Server
Start by connecting to and logging into your home router. This will act as the Relay server in the connection. We’ll be using a Peplink MAX BR1 Mini in our example.
Navigate to the SpeedFusion Connect tab. Click on setup relay mode. A new screen should appear. Click where it says cloud location and select the location closest to your home.

When done, click on the green checkmark to the right, followed by the apply changes button at the top right.
Once applied, your SpeedFusion connect name will appear with a relay sharing code to the right. Copy this and then apply the changes before moving on.

Configuring the Relay Client
Now that we have configured the server connection, we’re going to log into the client router. In this case we will be using a Peplink Balance 20X.
Navigate to the SpeedFusion Connect tab. Select choose cloud location and a new screen will appear. Refer to cloud location here and click where you see the blank field. A drop down should appear. Select home sharing and then paste in the code you copied from the server router. Click the green checkmark to the right, followed by apply changes at the top right.

Navigate back to the Dashboard to check the status of the changes. Once applied, we will see the SpeedFusion connection appear. Wait while it cycles through the connection process. After a moment, it should say established.

Routing All Traffic Over the SpeedFusion Relay
At this time, we need to configure the client router to send all traffic over our newly connected Speed Fusion relay. Navigate to the network tab, although for some Peplink routers, this will be under the advanced tab. Select Outbound Policy on the left. Click on Add rule here.
Give the custom rule a unique name such as SpeedFusion Relay. Confirm the enable checkbox is checked. Source and Destination should be set to Any. Set the algorithm to priority and then drag and drop your SpeedFusion connection into the WAN list. It should be positioned at the top of the list so that all traffic routes over this connection first. If this fails for some reason, it will fail over to the WAN connection or connections you have in place.

Leave the remaining settings as is. Click save, then apply changes. We’ll then go back to the Dashboard page again to confirm changes are applied and our SpeedFusion is still established.
Checking the Connection
We can also check the connection at the server router and then verify our configuration is working. Once logged back into the server router, first verify the Speed Fusion connection shows it is established here with 1 out of 1 relay clients. Note that additional client connections can be purchased if needed.

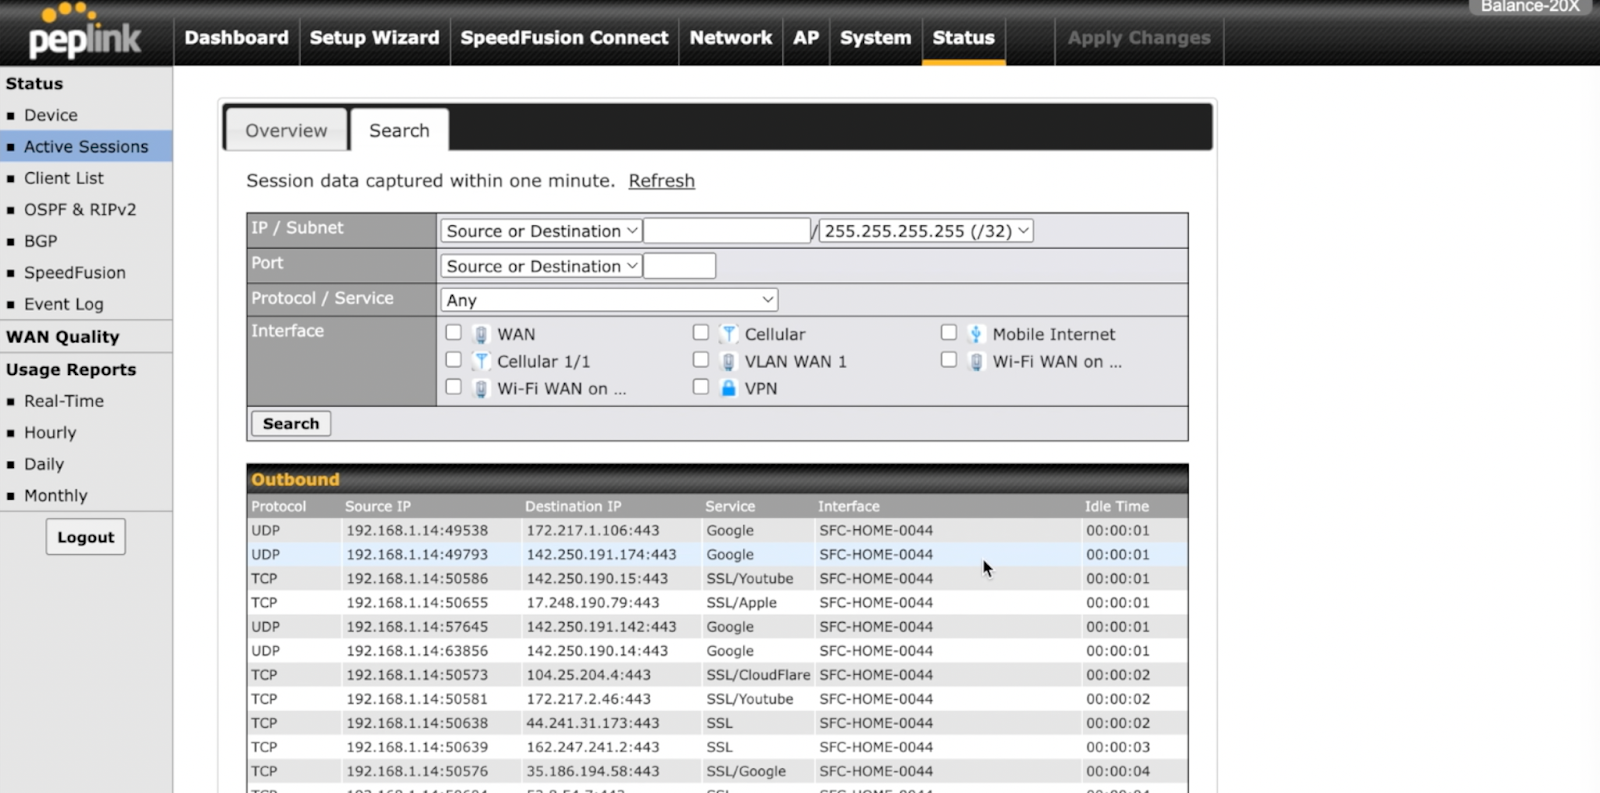
At the client router’s web admin page, navigate to the status tab and click on client list. This is where we can confirm the IP address our computer is receiving from the router’s private network. Now that we’ve noted this, we’ll go to active sessions on the left. Click on the search tab at the top of this page and then scroll through the outbound sessions list. This is where it tells us which Internet or WAN service our computer is connecting to the Internet over. As we can see here, it shows our SpeedFusion relay connection, which confirms our configuration is working correctly.
If you have more questions, or you’re interested in purchasing additional relay connections, contact our team by phone, email, or chat!