

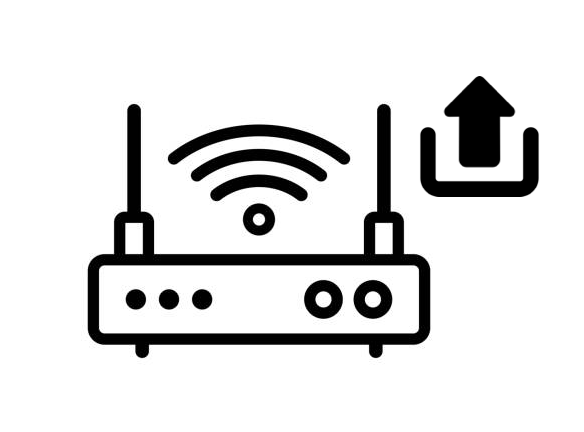
The humble router. It’s that little box in your home or office that connects you to the vast world of the internet. But how often do we think about it until something goes wrong? Whether you’re a tech wizard or just someone who wants a smooth internet experience, understanding why it’s important to save your router’s configuration can save you from headaches down the line.
Picture this: the team at 5Gstore is like the superheroes of router troubleshooting. They’re always testing and fixing routers, and sometimes they have to reset them back to square one. But here’s their secret weapon: they don’t waste time reconfiguring everything manually. Instead, they use something called a configuration file.
A configuration file is like a snapshot of your router’s settings at a specific moment in time. It holds everything from your WiFi name and password to your security settings. So when things go haywire, you can just upload this file and voila! Your router is back to normal in no time. It’s not only a time-saver but also ensures that all your devices stay connected seamlessly, whether you’re at home or running a business.
But why should everyday folks bother with this? Well, think about those pesky firmware updates your router occasionally asks you to install. Sure, they promise better performance and security, but what if something goes wrong? Without a backup of your configuration, you might end up spending hours reconfiguring everything or, even worse, losing important data.
Plus, saving a fresh copy of your configuration after each update acts as a safety net. If you ever run into trouble afterward, you can easily revert to a previous setup and troubleshoot without pulling your hair out.
This practice becomes even more crucial as technology keeps evolving. Months or years down the line, when you’re scratching your head over why your WiFi suddenly stopped working, having that saved configuration file will be a lifesaver. Instead of trying to remember settings from ages ago, a quick upload will bring your router back to its former glory.
So, saving your router’s configuration is like giving yourself a safety net for your digital life. It lets you navigate the ever-changing world of technology with confidence, knowing that your network settings are safe and sound. Whether you’re a tech guru or just someone who loves binge-watching Netflix, remember: a little preparation goes a long way when it comes to routers.
If you’re ready to backup your configuration file today, and you have a router from Cradlepoint, Digi, Inseego, Peplink, or Sierra Wireless, check out the step-by-step instructions we have available below!
Cradlepoint
- Connect via Ethernet LAN port or WiFi to your router
- Log into its web admin console – the default address is 192.168.0.1 – with your admin credentials
- Navigate to the ‘System’ tab -> ‘System Control’ -> ‘NetCloud OS’
- Refer to the ‘System Config Save’ section here and click ‘Download Settings’
- Save this file somewhere you can easily access it when needed.
- You may follow these same steps to upload your configuration file by clicking the ‘Restore Settings’ button here.
Digi
- Connect via Ethernet LAN port or WiFi to your router
- Log into its web admin console – the default address is 192.168.2.1 – with your admin credentials
- Navigate to the System tab and under ‘Configuration,’ select ‘Configuration Maintenance.’
- Refer to the ‘Configuration backup’ section
- Enter your device’s admin password and click the ‘Save’ button
- Save this file somewhere you can easily access it when needed!
- You may follow these same steps to upload your configuration file at the ‘Configuration Restore’ section here.
Inseego
- Connect via Ethernet LAN port or WiFi to your router
- Log into its web admin console – the default address is 192.168.1.1 – with your admin credentials
- Navigate to the ‘Settings’ tab on the left, then select ‘Backup and Restore’
- Enter your Admin password in the ‘Admin Password’ field
- Click the ‘Download’ button and save this file somewhere you can easily access it when needed
- When necessary, you can restore settings at the same page by entering the Admin password at the ‘Restore Settings’ section and then clicking ‘Restore Now’ button
Peplink
- Connect via Ethernet LAN port or WiFi to your router
- Log into its web admin console – the default address is 192.168.1.1 or 192.168.50.1 – with your admin credentials
- Navigate to the ‘System’ tab and select ‘Configuration’ on the left
- Refer to the ‘Download Active Configurations’ section and click ‘Download’
- Save this file somewhere you can easily access it later
- When needed, you can upload the configuration file at the same page under the ‘Upload Configurations’ section.
Sierra Wireless
- Connect via Ethernet LAN port or WiFi to your router
- Log into its web admin console – the default address is https://192.168.13.31:9191 (for older devices running AceManager) or https://192.168.1.1 (for newer devices running AirLink OS) – with your admin credentials
- For AceManager devices: Navigate to the ‘Template’ tab and refer to the ‘Download Template’ section. Give it a unique name and select whether or not to include passwords and device info, then click the ‘Download’ button. When needed, you can reload settings at the same Template area under ‘Apply Template’
- For AirLink OS devices: Click the template icon at the top right. It looks like a gray square with a checkmark, then select ‘Create template from current configuration.’ Click ‘Export to file’ at the bottom of the page and save the file. When needed, you can go back to the Template icon and select ‘Apply a template’ and this will allow you to restore from your saved file.