Peplink’s Integration with Starlink

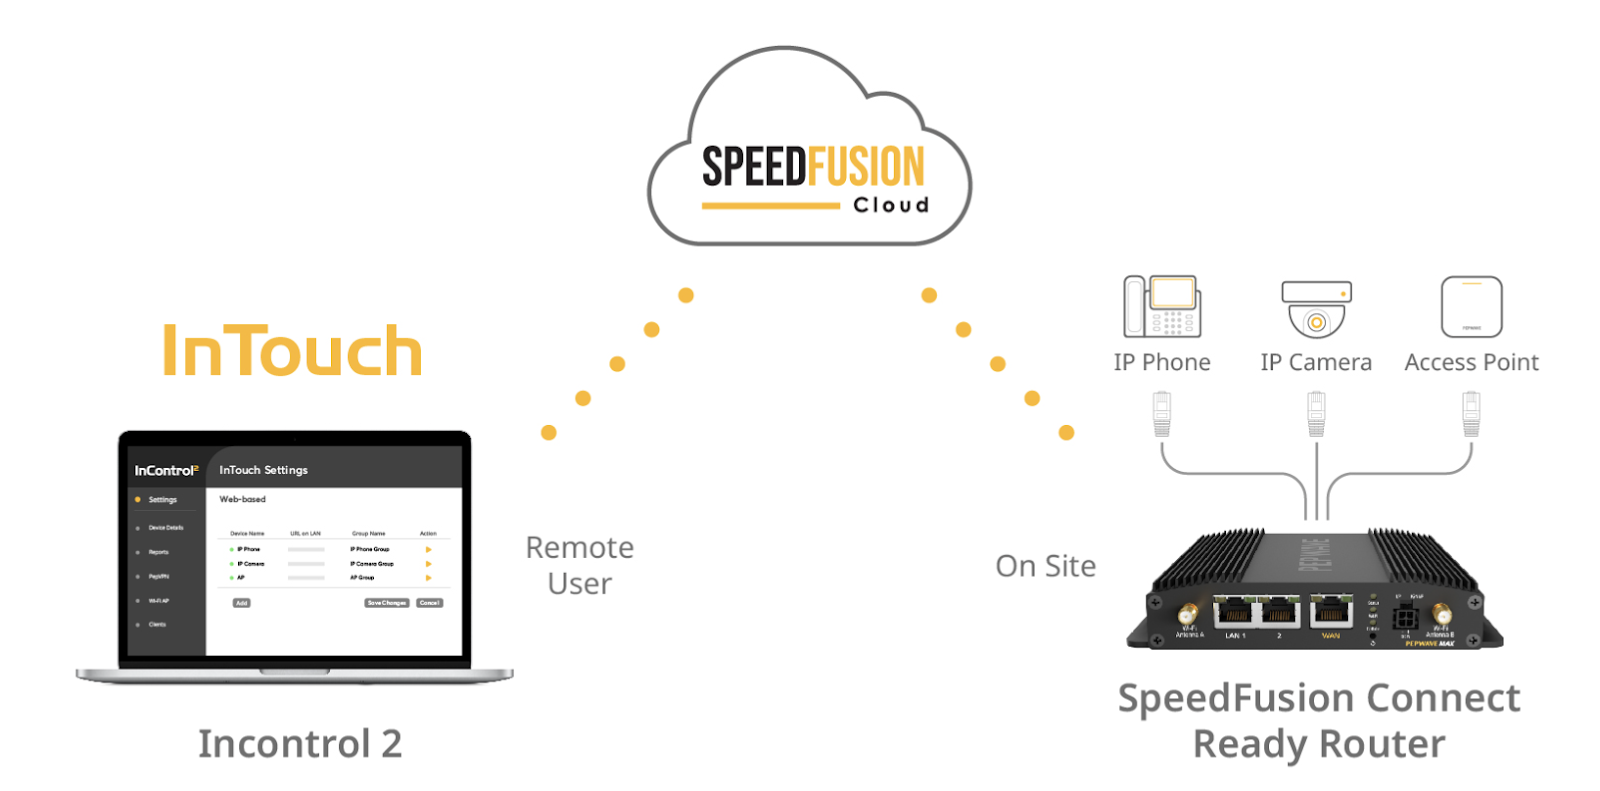
With the advent of satellite internet services like Starlink, users are now able to access high-speed internet in remote areas. Peplink, a leader in SD-WAN solutions, has taken a significant step in supporting Starlink connectivity, offering users a robust set of tools to monitor and manage their connection seamlessly.

Monitoring Starlink Dish Status

One of the key advantages of Peplink’s support for Starlink is the ability to easily access crucial dish status information. Through InControl 2, Peplink’s cloud management service, users can gain insights into metrics such as throughput, latency, and obstruction status. This invaluable data empowers users to optimize their internet experience and troubleshoot any potential issues with ease.

Reboot and Stow with a Click

InControl 2 provides a user-friendly interface to reboot and stow your Starlink device effortlessly. No more manual interventions or complex procedures – a simple click through InControl 2 allows you to perform these actions remotely. This feature is particularly useful for users who want to ensure optimal performance or temporarily disable their Starlink connection.

Enabling Access: A Step-by-Step Guide

To harness the full potential of Peplink’s support for Starlink, follow these steps to enable access and view your dish’s data:

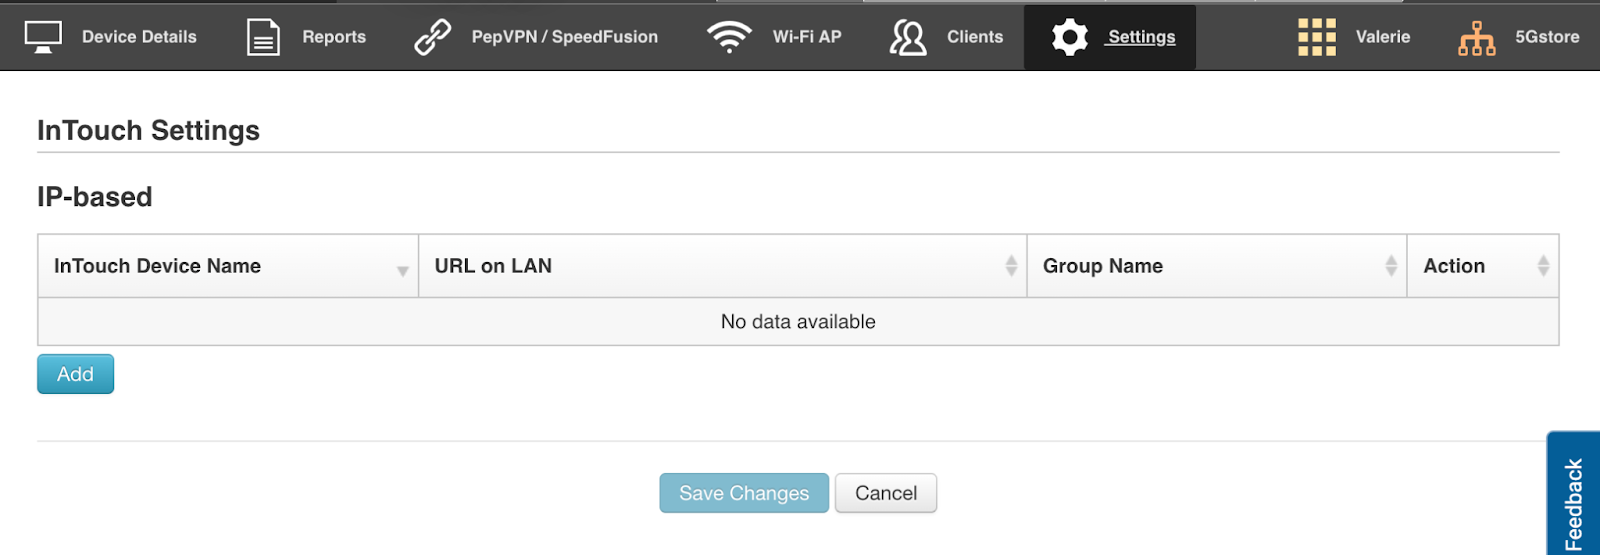
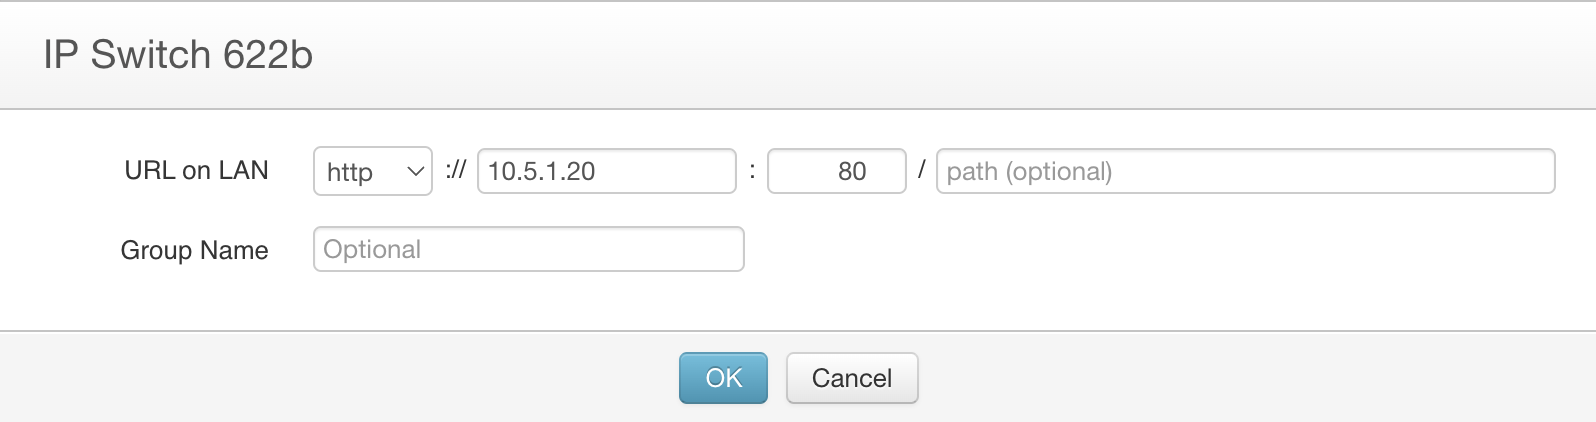
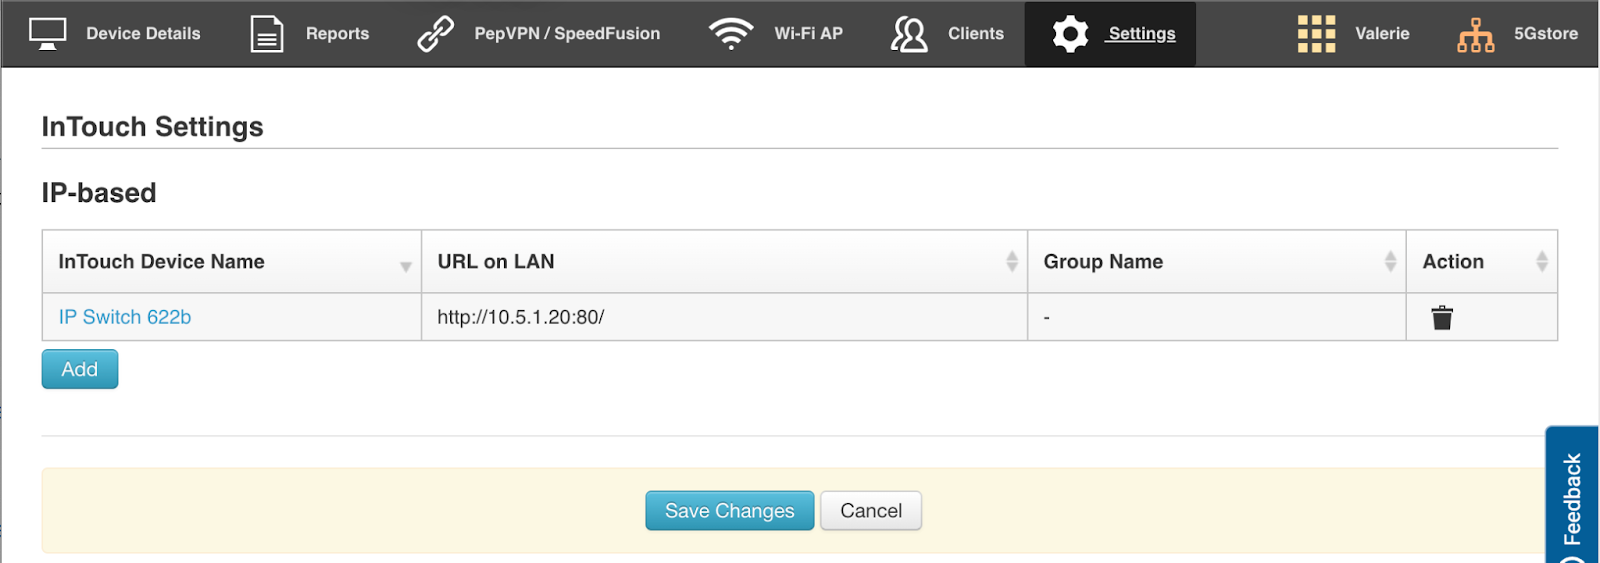
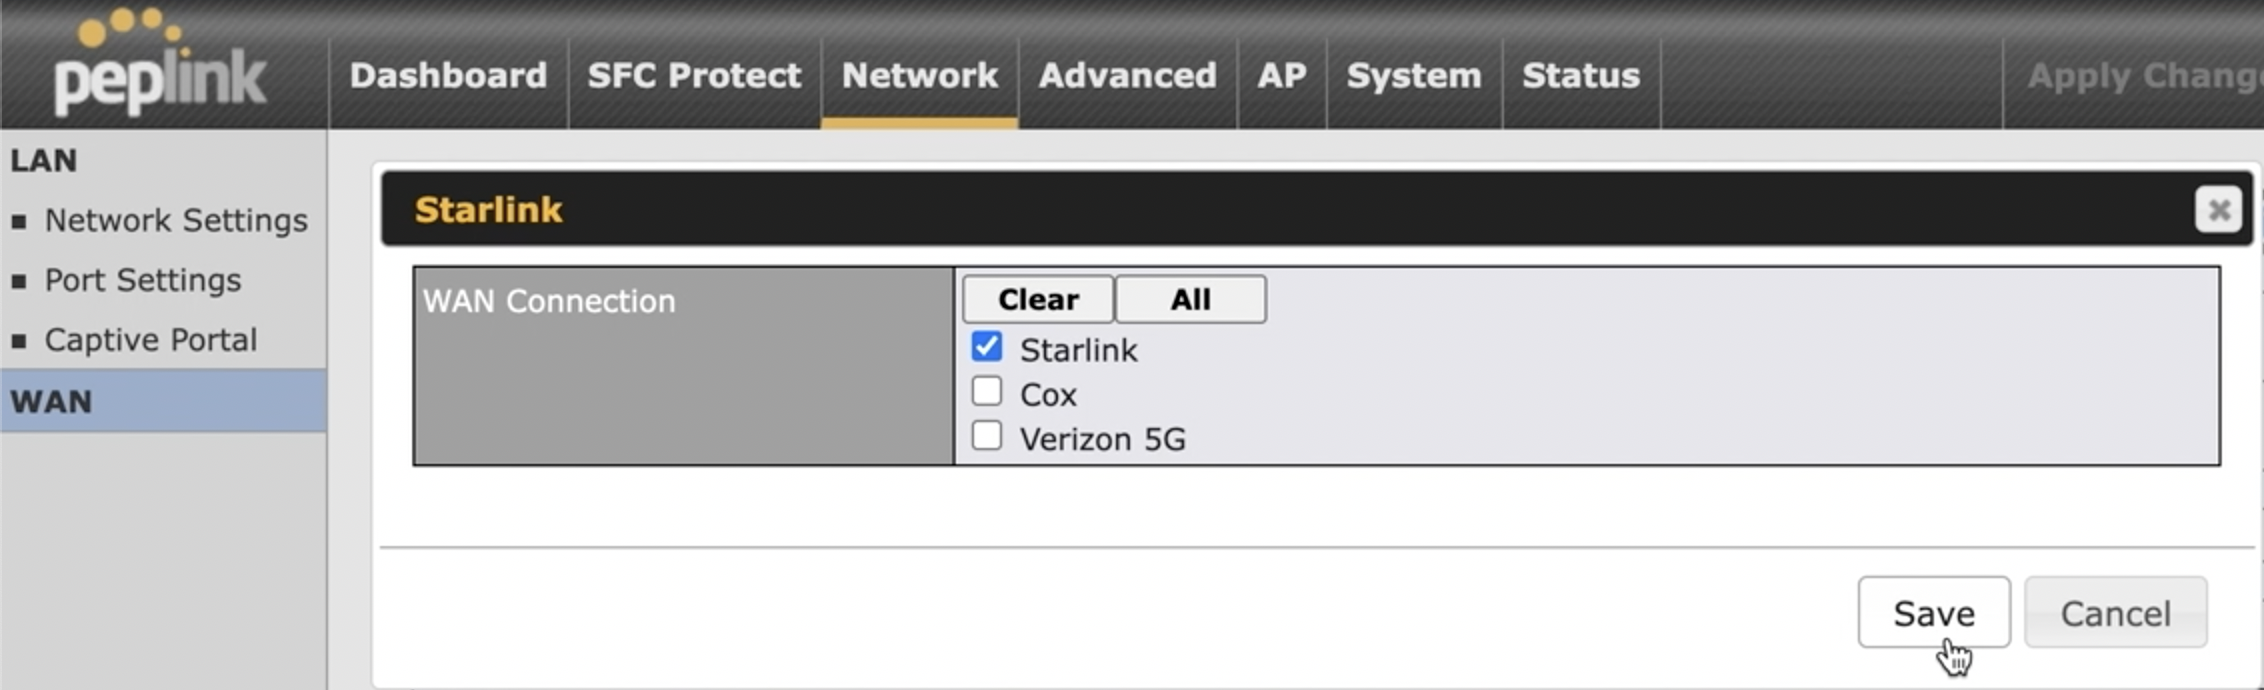
  • Web Administration of Peplink Router:
    • Navigate to the Network tab and select WAN on the left.
    • Scroll to the bottom of the page and edit the “Starlink” setting.
  • Pairing Starlink Connection with WAN Source:
    • Pair the Starlink connection with a WAN source on your router.
    • Save and apply the changes.
  • Verification:
    • Once completed, a Starlink logo will appear beside the paired WAN connection.
  • InControl 2 Configuration:
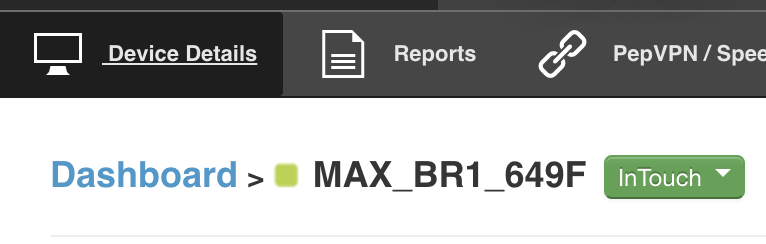
    • Log into InControl 2 and locate the organization and group where your Peplink router is saved.
    • Click on the device to access its details page.
  • Accessing Starlink Details:
    • In the Status section on the right, click “Details” beside your Starlink WAN connection.

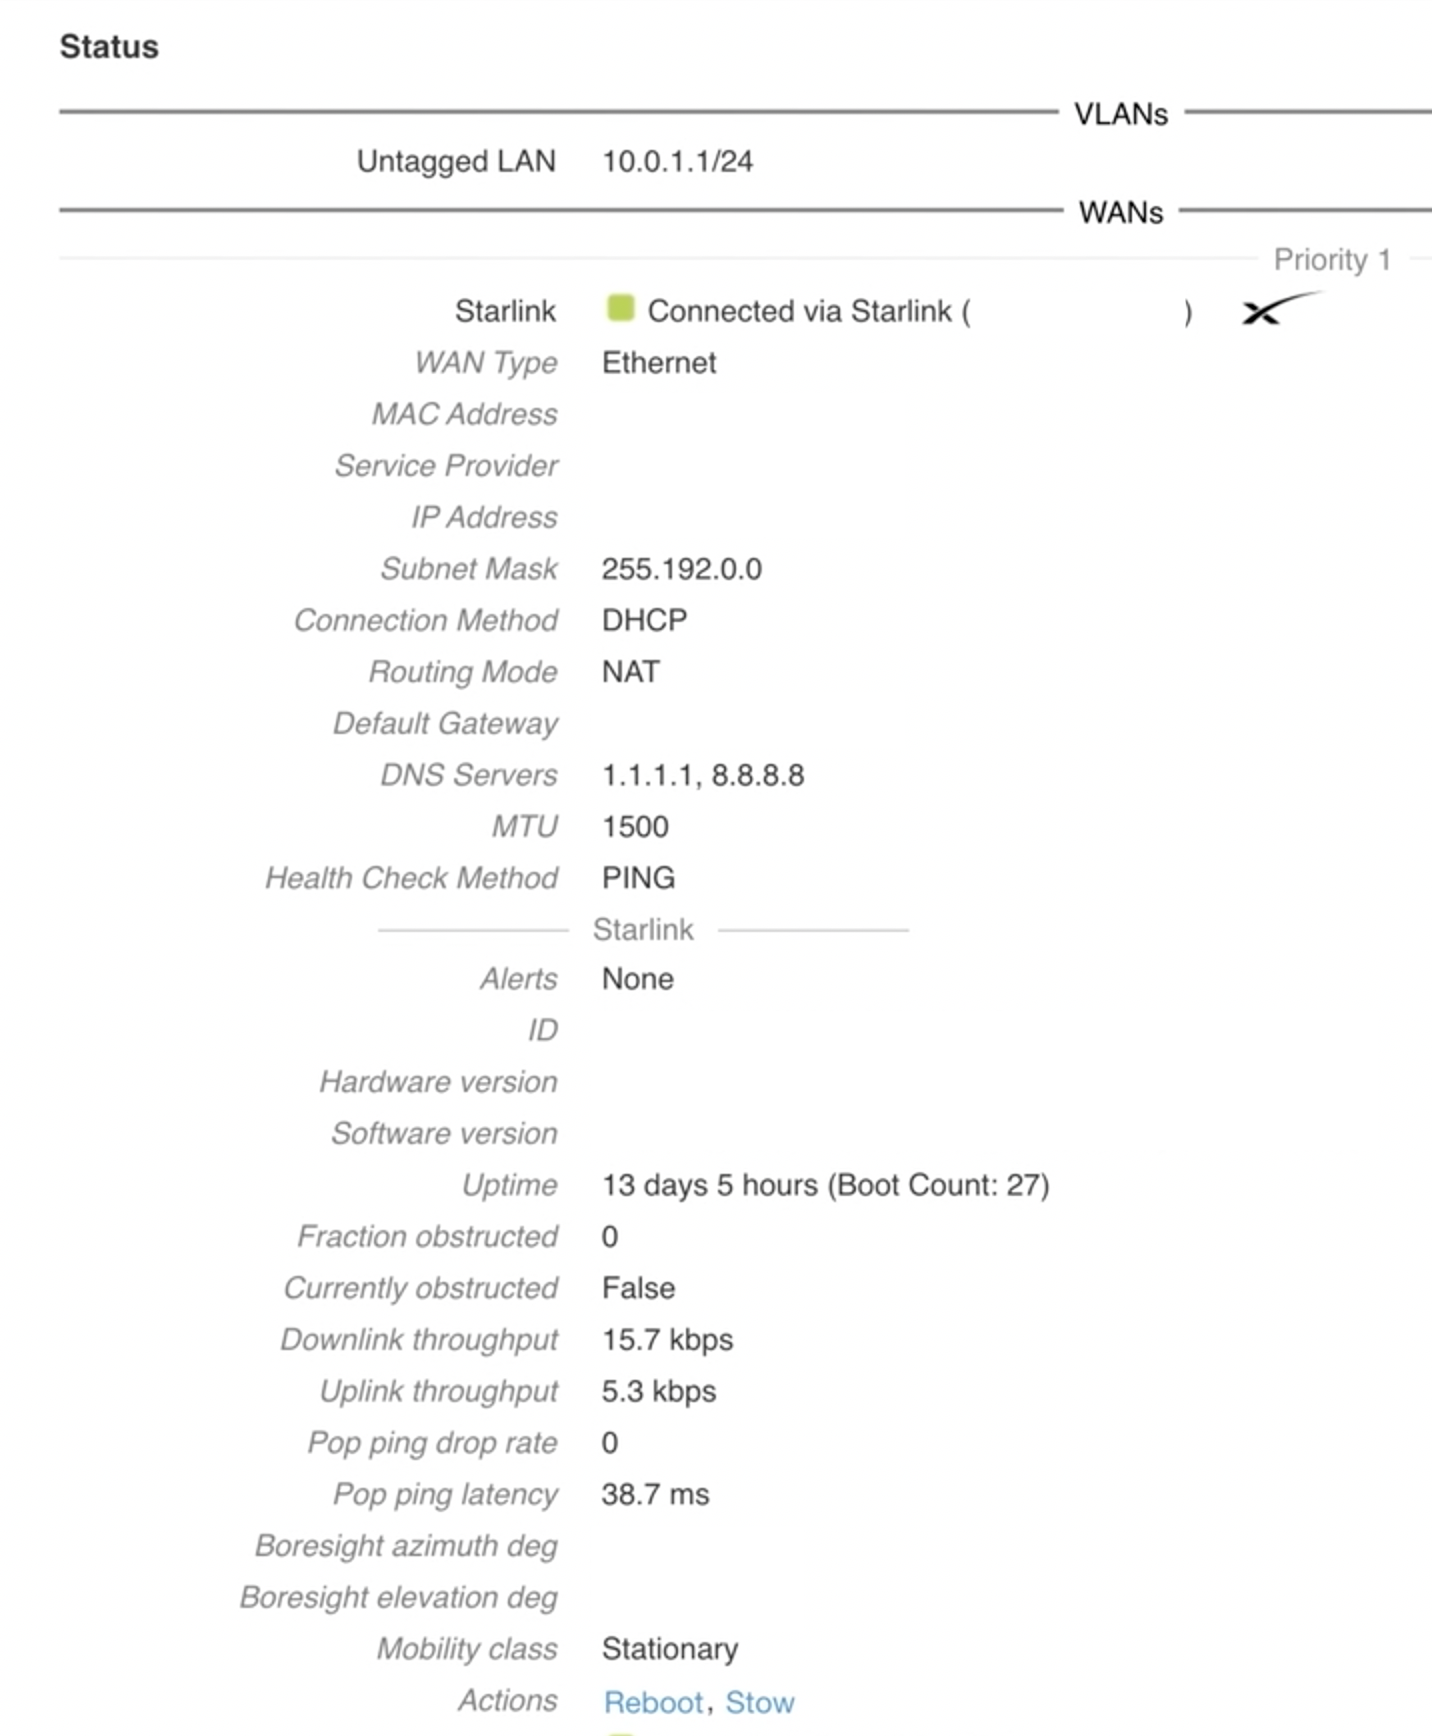
By following these steps, you can unlock a wealth of information about your Starlink connection, ensuring you have the necessary tools to maintain and optimize your internet experience.

Conclusion

Peplink’s support for Starlink marks a significant stride in providing users with comprehensive control over their internet connectivity. The ability to monitor throughput, latency, and obstruction status, coupled with the convenience of remote reboot and stow functions, makes Peplink routers an ideal choice for users harnessing the power of Starlink. Embrace the future of satellite internet with Peplink’s innovative solutions, where control and accessibility are just a click away.

Where to Find Information About Peplink’s InTouch for Remote LAN Management

With Peplink’s release of router firmware 8.2.0, they added a new feature called “InTouch.” For remotely accessing LAN devices on your network, no longer will you need a public IP address, costly VPN services or Out of Band Management (OOBM) licenses.

There has not been much information surrounding this feature, but the company will be publicly announcing it on April 19. 

Peplink describes the feature as a service that allows remote management of any device, anywhere. InTouch leverages SpeedFusion Cloud and InControl2 by extending your reach to any device UI backed by a Peplink router. 

InTouch is easy to set up and all you need is the following:

  • a valid InControl2 subscription
  • a SpeedFusion Cloud data plan
  • a Peplink router running firmware 8.2.0

Want to see just how easy it is? Check out our instructional walk-through here.

How Does Peplink’s New InTouch Feature Work?

With Peplink’s new firmware version 8.2.0 comes a new feature that has been long awaited by many users, including our team. That feature is called “InTouch” and it allows folks to access IP based devices that sit behind their Peplink router. It works by leveraging SpeedFusion Cloud, which means you must have an active SpeedFusion Cloud connection. 

We wanted to test this out to see how well it works. Outlined below are instructions. In our example, we are accessing our Remote Power IP Switch, model UIS-622b. This device helps to monitor our router’s WAN connection as well as local devices on the network. If the Internet connection fails, or a device drops its connection to the network, a reset to the router or other device’s power is triggered. This usually resolves the connection issue. 

  1. Log into your InControl2 account at https://incontrol2.peplink.com
  2. Select the Organization, then Group of the router you want to access devices behind
  3. Click on the router device from the group to open the Device Details page
  4. Hover over the Settings tab and select InTouch
  1. From this page you’ll add devices you want to access. Click Add
  1. Enter a name for the device and its local IP address – you can obtain this from the cloud app or Cloud4UIS.com for your Switch OR you can typically find this from your router’s client list. 
  2. Click OK 
  1. Click Save Changes on the next screen
  1. Now that we’ve added our device, we can access it from the Device Details page or Group Overview page. 
  1. Shown here is the Device Details page. Note the new InTouch button. 
  1. We’ll click here to select the IP Switch we just added. 
  1. A new page will open and we’ll be connected to the web administration page of the IP Switch.