Peplink: Take Control of Your Management Software

So, you have purchased a Peplink Router—Congratulations! This can be an exciting prospect for many users looking to implement Peplink products into their network or use Peplink as their primary source of Internet. One of the most popular reasons for purchasing a Peplink is their remote management service, this comes in the form of the Peplink InControl 2 website (IC2) and the Peplink app, or basic local administration from the router itself. New Peplink users can find these options a little daunting. 5Gstore is here to help you get started! We will discuss the different ways you can manage your Peplink devices and some issues that may occur when using them.

InControl 2 Cloud-Based Management

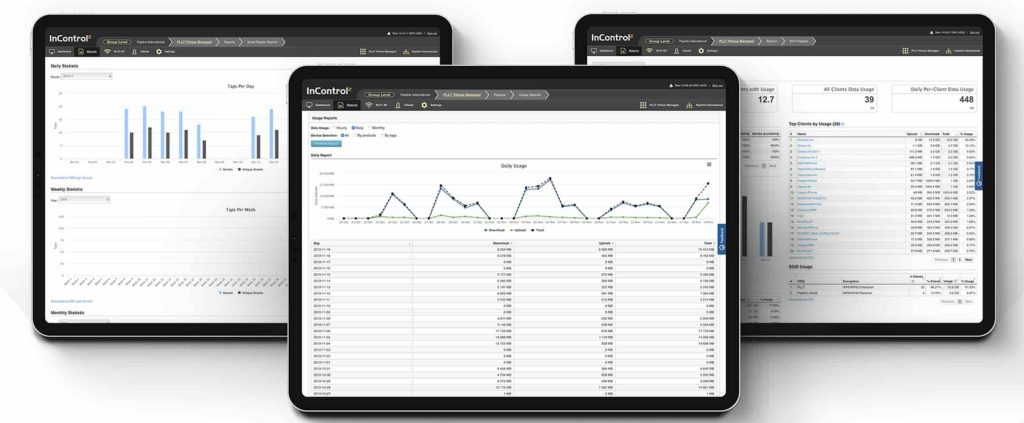
Network management requires constant maintenance, standardization of device configurations, monitoring of network health and urgent troubleshooting. If you are a general home user or an experienced technician monitoring large networks, Peplink’s InControl 2 cloud-based remote manager has you covered. This cloud-based management platform empowers users with unparalleled oversight and control over their Peplink devices, all accessible through the convenience of any web browser. Whether it’s deploying mass configuration changes, monitoring real-time network stability or responding to unexpected issues, InControl 2 streamlines these tasks with a very user-friendly interface. When it comes to managing even a single router with InControl 2, you do not have to be a networking engineer. In fact, in most cases, configuring settings through InControl 2 is easier than manually configuring the router from its administrative graphical user interface (GUI).

Peplink App

The Peplink app provides users with the convenience of managing their network from anywhere, at any time. Optimized for mobile devices, the app allows users to quickly access key networking features, monitor the health and performance of their Peplink devices, and receive instant alerts. While it offers a more condensed interface than its web-based counterpart, the Peplink app is engineered for efficiency, ensuring that essential functions are easily accessible. Whether you’re troubleshooting on the go, adjusting configurations, or checking the status of your network, the Peplink app simplifies network management. The app is currently available on Android and iOS devices to provide flexibility and control over your network.

Local Web Administration

As with all routers, Peplink is configurable directly from the device itself. This is accomplished by connecting to the router’s wifi or connecting a pc or laptop to one of your device’s LAN ports. Once connected you can visit the device’s web admin by opening a browser (Google Chrome, Firefox, etc.) and typing in the IP address of your router. For Peplink this will either be 192.168.50.1 or 192.168.1.1, depending on if the Peplink is a Pepwave MAX or a Peplink Balance router. This will give you full access to your router’s configuration. When comparing this option to the previously discussed InControl 2 and Peplink app, most users may find configuring their Peplink unit to require more effort and knowledge of router settings. 

Which Management Option Is Best?

Choosing the right management tool for your Peplink devices can significantly improve your networking experience. 5Gstore personally recommends InControl 2 if you want as much control as possible from anywhere at any time and while the Peplink app offers convenience for basic management tasks on the go, Peplink’s InControl 2 platform stands out as the superior choice for comprehensive network management. InControl 2 provides a unified dashboard that allows you to monitor and manage all of your Peplink devices across multiple locations.

 This platform excels in its depth of features and will continue to be the leading management platform from Peplink when it comes to getting new updates and features. InControl 2 management can also be shared to anyone that you want to have access to assist in your networking management and the amount of access that you provide another user can be adjusted.

If you are a 5Gstore customer this provides an added bonus to your 5Gstore tech support. Having a problem with your configuration and not sure where the problem is? As a 5Gstore customer you can add our tech support agents directly to your InControl 2 group for hands-on assistance from your rep. 5Gstore does not directly support the Peplink app and providing hands on support is not always an easy task when using the local web admin. However, if you are still deciding which way to manage your Peplink, below is a general guideline for each option based on use case!

  • Peplink App – Configure router settings remotely with a simplified user interface on a mobile device
  • Web Admin – Configure basic to advanced router settings in 1 router on a desktop
  • InControl 2 – Monitor the status of multiple routers, with quantities varying from a few to hundreds, and apply configurations to the devices (e.g. firmware upgrade schedule, outbound policy) all at once.

Can All 3 Options Be Used At The Same Time?

This is where management can be a bit more complex. You can essentially have access to all 3 options, but if you allow InControl 2 to manage your settings you will have a limited view of certain details within the app such as Data usage/WAN quality, and Connected devices. As for the InControl 2 and the Peplink app you must choose which one to place in control of your settings. InControl 2 and the Peplink app will override any changes made directly from the router login and will compete for control. If you choose to use InControl 2 first when you access the app you will be warned that InControl 2 is managing your settings already. If you’re unsure which one to use, refer back to the suggested use cases for each one. 

Troubleshooting Issues That May Occur When Using The App or InControl2

If you have managed to configure your router, but you are running into issues with conflicting settings you aren’t sure how to resolve, here are some common issues that you may encounter along with steps to assist you in fixing them. 

The App Shows That My Router Is Registered On InControl 2 And I Cannot Proceed, What Should I Do? 

This message is displayed when the router is already registered inside a group on InControl 2, and the group setting of “Allow managing devices in Peplink App” is set to “No”. To give access rights to the Peplink app, the admin of the group must change the setting to “Yes” first. You can then tap “The setting has been updated” to try again. Follow the steps below to make this change:

Login to your InControl 2 account. From here you will need to navigate to the Group level from your main Organization. In the image below you can see the Organization>Group Name and it shows that you are on the Group Level. 

Hover over the “Settings” Icon and you will see a drop down menu with Group Settings at the bottom, Click this option. You will be brought to a new section and you will need to scroll down to the “Peplink App” section.

I Am Trying To Make Changes To My Router Via The App But My Changes Are Reverting Back To The Previous Settings. What should I do?

This issue is most likely due to settings being applied from InControl 2 first and then trying to alter the settings later from the Peplink app. We recommend accessing the web admin of your router and checking to see if the following message is displayed for your settings on the router.

If you see this message then InControl 2 is currently managing your settings. You will need to login to your InControl 2 account and remove the InControl 2 managed settings and make sure “Allow managing devices in Peplink App” is set to “Yes”

It is important to note that if you are managing settings with InControl 2 and don’t remove the IC2 settings and allow app control you may encounter issues with your Peplink settings.

If you are not seeing that message and are still having issues and are unsure of which steps to take, it may be necessary to disable InControl 2 management entirely from within your router and see if the issue is resolved. You can do this by accessing the Web Admin of your Peplink and navigating to Status>Incontrol 2> and disable Incontrol 2 management.

When in doubt, always double check that your settings aren’t currently being managed somewhere else if you are having trouble applying settings from one of the management options. Of course, if you have purchased your Peplink device directly from 5Gstore you can call our helpful support agents at 833-547-8673 Mon – Fri 9am-6pm Central Daylight Time.

Cloud Management Services for Cellular Routers 

What They Are & Why You Should Use Them

When you purchase some sort of electronic device, you normally have the option of purchasing an extended warranty for it. This might not only give you the option of hardware replacement, but added benefits. When it comes to routers – like the ones we carry from Cradlepoint, Digi, Inseego, Peplink, and Sierra Wireless – you may also have the added benefit of a cloud management service. 

What is a Cloud Management Service? 

This is essentially a website you can log into from anywhere in the world and both monitor and manage your routers remotely. Of course, in order to be able to do this, you must have a valid warranty and or cloud subscription for each of your routers. 

Why Should I Use a Cloud Manager?

Cloud management services are somewhat similar to device registrations with the manufacturer. It proves you own the device and protects it from being added to another user’s management account. They help to keep an eye on your devices by monitoring the health of the device, its uptime, and signal strength. Configurations are streamlined, as it allows you to get devices online more quickly.

What Benefits Do Cloud Managers Provide?

Other than remote visibility of your routers’ connection status in real-time, there are several benefits to having cloud management service for your devices. 

  • Lower Overall Management Costs: Reducing the cost of configuring and deploying your devices through a single platform.
  • Increased Productivity: Manage multiple devices at the same time and reach your goals more quickly and efficiently.
  • Maintenance: Minimizing the cost of keeping your devices current and secure with easy deployment of software and security updates.
  • Security: Lock down access to your devices to authorized personnel and improve the overall security on your networks. 

Common features include:

  • Configuration by device or group
    • Save time by setting up configurations that can then be uploaded to your device or groups of devices. Most devices support Zero touch provisioning (ZTP), which allows you to automatically deploy device configurations over a network connection.
  • Data usage tracking and alerts
    • Avoid overage fees by staying up to date on how much data your device(s) are using. 
  • GPS tracking
    • Verify where your device has traveled in the past or view it in real time.
  • Firmware update
    • Ensure proper maintenance for your device(s) by upgrading firmware as needed. This can sometimes be done for a group of devices also.
  • Device diagnostics for troubleshooting
    • Use tools like ping and traceroute to verify how traffic is flowing on your network. Additionally, you may reboot your device as needed or in some cases, you may set a reboot schedule. 

Less Common Features

  • Remote access to the web UI
    • Use the management service to log into your device remotely, just like it works locally, or similarly.
  • Remote Access to devices on the LAN of the router
  • VPN Connectivity and simple configuration
    • Link devices with the use of VPN, which can easily be configured through the cloud manager.
  • API support
    • The API is an interface for developers to integrate their systems and/or scripts with the data available in the cloud manager. This may include online/offline status of routers and network interfaces, signal strength and quality of cellular modems, router logs, and more.
  • Fast Renewal Activation
    • Renewing service can be a real pain, but not when it comes to processing licenses for Peplink at 5Gstore.com. We have an automated system that allows you to enter your Peplink serial number in our website search field and it will report back compatible licenses. Once your license is purchased, it takes mere minutes to be processed.

Some warranties include these cloud services and in those cases, the cloud service is valid for as long as the warranty is. Here’s what each manufacturer offers:

Cradlepoint NetCloud 

  • Warranty, support and cloud management services are bundled under the NetCloud subscription, which is available for 1, 3 or 5 years.
    • Features include:
      • Bulk configuration and firmware updates
      • Troubleshooting and diagnostic tools
      • Custom alerts and reports
      • Location services and coverage mapping
      • Cellular plan monitoring and forecasting
      • API option

Digi Remote Manager

  • Cloud service is available through a license separate from the device warranty. Premier service plans are available for 1, 3, or 5 years.
    • Features include:
      • Configuration manager
      • Location mapping
      • Bulk firmware upgrades
      • Out of Band Management
      • Alarms and On-Demand Reports
      • Web Service APIs

Inseego Connect

  • Basic management is included for the life of the device, but has limited features compared to their Standard and Advanced plans. It is mainly for device inventory and status monitoring. Standard is best for focusing on monitoring device health and remotely configuring devices. Advanced includes all the standard features plus additional analytics and insights into how devices are being utilized. These are both available for an additional fee for 1 or 3 years. Note that when purchasing the Advanced plan, this includes warranty and support, also for 1 or 3 years.
    • Features include:
      • Bulk Configuration of groups of devices
      • Location mapping
      • Access to key health metrics
      • Data usage tracking
      • Set alerts and perform diagnostics
      • Firmware updates

Peplink InControl 2

  •  Cloud management is included with a valid warranty, of which it is 1 year standard. Optional warranty extensions are available at 1, 2 or 4 years. For non-PrimeCare Velocity and Volume-Based series devices you also have the option for 1 or 2 years of cloud management only.
    • Features include:
      • Bulk configuration
      • Remote access to web UI and devices on the LAN
      • GPS fleet management
      • Troubleshooting tools
      • API option

Sierra Wireless/ Semtech AirLink Management Service

  • Warranties include support and cloud management for 1 year. Upgrades are available for 1 year on AirLink devices.
    • Features include:
      • Mass configuration
      • Location mapping
      • Device alerts and reports
      • Firmware upgrades
      • Data usage tracking
      • Diagnostic tools
      • Web services API

How Much Data Will Cloud Manager Services Use?

You may also be wondering how much data usage the Cloud Service is going to require. This is especially important for users who have limited data plans for M2M or IoT applications. Let’s take a look at the minimum usage for each system. 

Cloud Management ServiceMinimum Data Usage
Cradlepoint NetCloudData usage ranges from 5-10 MB per router per month in typical scenarios. Settings like connection pulse intervals significantly impact usage. Faster pulses increase data usage, while slower pulses risk connection issues but save data.
Digi Remote ManagerWithout updates and default settings, it uses approximately 4.68 MB on cellular and 18.1 MB on non-cellular connections monthly. However, if all features are enabled, it can go up to 263 MB monthly. To minimize data usage, users can disable non-essential features like event logging and adjust keep-alive intervals. 
Inseego ConnectAverage is 100 MB monthly, but this can increase depending on usage. While this service doesn’t offer extensive customization options, being mindful of data-intensive activities can help minimize usage.
Peplink InControl 2Monthly data usage averages 339.7 MB with GPS enabled and 172.3 MB with GPS disabled. Users can optimize data consumption by adjusting reporting metrics. Enabling Low Data Usage Mode in particular, significantly reduces data usage, down to 6.9 MB with GPS enabled and 1.3 MB with GPS disabled.
Sierra Wireless/ Semtech AirLink Management ServiceWith default configurations, devices use around 2.7 MB/day without telemetry and 3.3 MB/day with telemetry. Disabling both telemetry and the Network Watchdog reduces usage to approximately 400 KB/day. 

What Happens When I Don’t Renew My Cloud Management Service?

Most manufacturers will include some sort of cloud service with the purchase of the hardware. This may make you more inclined to use it, but what happens when the service expires? While in most cases, you can still log in and view past data, most or all remote management features are lost. This includes the ability to log into your device or devices behind it, firmware upgrades, and GPS as well as data usage tracking. 

ManufacturerIncluded Cloud ServicePost Expiration Functionality
Cradlepoint1, 3 or 5 yearsSome, or all features become unusable. More info
DigiNoDevice reports no longer available, including data usage. Individual Device Stream data is retained, and could be accessed via the API.
InseegoBasic plan for life of deviceRemote management and data tracking is unavailable.
Peplink1 yearRemote access, configuration, and data tracking is lost. Past reports are still accessible.
Sierra Wireless/ Semtech1 yearRemote management and data tracking is lost.

How Do I Renew My Cloud Management Service?

  • Cradlepoint: Alerts are sent to the admin at 90 days before expiration and again at 30 days before expiration, if no order has been placed. If you choose to renew after your devices have expired, there may be a 10% reinstatement fee applied. Simply contact sales@5gstore.com with your device serial number(s) and email address associated with your Cradlepoint NetCloud account and we’ll follow up with a quote. 
  • Digi: When it comes time to renew your Digi devices, you may purchase subscriptions per device, right at 5Gstore.com. Note your device serial number(s) and the email on the Digi Remote Manager account is needed at checkout. 
  • Inseego: At renewal time, go to 5Gstore.com and purchase the subscription of your choice. You will need to enter the device IMEI number(s) at checkout. 
  • Peplink: Alerts are sent at least 30 days prior to expiration of your Care plan, and a 30 day grace period is provided after expiration, if needed. After the 31st day from the Care Plan expiration date, a diagnostic report is required to be submitted and verified by Peplink. You may either email sales@5gstore.com with your Diagnostic Report or submit it at checkout. Not sure what license you need? Just enter your device’s serial number in the 5Gstore.com search bar and it will populate compatible licenses. Our team can also assist you with selecting the appropriate license for your needs. 
  • Sierra Wireless/ Semtech: Contact sales@5gstore.com with your device serial number(s) and email address associated with your AirLink Management Service account, along with your account UID, and we’ll follow up with a quote. 

How Much Will it Cost to Renew Cloud Management Service?

Want to get an idea of the yearly costs for the cloud service? Here is a breakdown of the costs by manufacturer: 

Manufacturer1 year renewal3 year renewal5 year renewal
CradlepointStarts at $72Starts at $216Starts at $360
Digi$48$126$210
Inseego$19.99$49.99N/A
Peplink*$29 (cloud only)/ $49 and up (Care plans)$49 (2 year cloud only)/ $98 and up (Care plans)N/A
Sierra Wireless/ Semtech$30 (RV, RX, LX, MP Series)/ $90 (XR Series)$90 (RV, RX, LX, MP Series)/ $270 (XR series)$150 (RV, RX, LX, MP Series)/ $450 (XR Series)
*Cloud only subscriptions apply to Velocity & Volume-Based series devices. PrimeCare and PrimeCare+ or EssentialCare and EssentialCare+ prices range, depending on the device model.

Is Cloud Management Service Right For You?

Whether you have one device to manage, or multiple devices, a cloud management solution could save you both time and money. In most cases this is best for administrators that need to manage several local and/or remote devices. However it can also be helpful for single device users as well. Features like data and client data usage tracking capabilities, as well as device diagnostic tools could prove beneficial.   

If after reading this you’re still unsure as to whether or not you want to use a cloud management service, reach out to our team for assistance. We’re available Monday through Friday from 9am to 6pm CT at 833-547-8673 or sales@5gstore.com

Peplink’s Integration with Starlink

With the advent of satellite internet services like Starlink, users are now able to access high-speed internet in remote areas. Peplink, a leader in SD-WAN solutions, has taken a significant step in supporting Starlink connectivity, offering users a robust set of tools to monitor and manage their connection seamlessly.

Monitoring Starlink Dish Status

One of the key advantages of Peplink’s support for Starlink is the ability to easily access crucial dish status information. Through InControl 2, Peplink’s cloud management service, users can gain insights into metrics such as throughput, latency, and obstruction status. This invaluable data empowers users to optimize their internet experience and troubleshoot any potential issues with ease.

Reboot and Stow with a Click

InControl 2 provides a user-friendly interface to reboot and stow your Starlink device effortlessly. No more manual interventions or complex procedures – a simple click through InControl 2 allows you to perform these actions remotely. This feature is particularly useful for users who want to ensure optimal performance or temporarily disable their Starlink connection.

Enabling Access: A Step-by-Step Guide

To harness the full potential of Peplink’s support for Starlink, follow these steps to enable access and view your dish’s data:

  • Web Administration of Peplink Router:
    • Navigate to the Network tab and select WAN on the left.
    • Scroll to the bottom of the page and edit the “Starlink” setting.
  • Pairing Starlink Connection with WAN Source:
    • Pair the Starlink connection with a WAN source on your router.
    • Save and apply the changes.
  • Verification:
    • Once completed, a Starlink logo will appear beside the paired WAN connection.
  • InControl 2 Configuration:
    • Log into InControl 2 and locate the organization and group where your Peplink router is saved.
    • Click on the device to access its details page.
  • Accessing Starlink Details:
    • In the Status section on the right, click “Details” beside your Starlink WAN connection.

By following these steps, you can unlock a wealth of information about your Starlink connection, ensuring you have the necessary tools to maintain and optimize your internet experience.

Conclusion

Peplink’s support for Starlink marks a significant stride in providing users with comprehensive control over their internet connectivity. The ability to monitor throughput, latency, and obstruction status, coupled with the convenience of remote reboot and stow functions, makes Peplink routers an ideal choice for users harnessing the power of Starlink. Embrace the future of satellite internet with Peplink’s innovative solutions, where control and accessibility are just a click away.

How to Lower Data Usage Through Peplink InControl 2

Cloud management services can be quite helpful in saving time and money, especially when you have several devices to manage. However, something you may not immediately consider is the amount of data usage it takes to maintain the connection between your devices and the management service. 

If you’re using Peplink hardware with InControl 2, enabling “Low Data Usage Mode” will significantly lower the amount of data generated. On average, InControl 2 can use about 339.7 MB with GPS data and 172.3 MB without GPS data. Once you enable low usage settings, you can lower that average to 6.9 MB with GPS data or 1.3 MB without GPS data. 

Note that enabling this setting will forcefully disable the health check settings on your devices. You will need to manually re-enable these settings at the web admin if needed. When selected, you will see that the “Device Reporting” gets disabled along with live status queries. At this time, you may also adjust the frequency at which the GPS location is collected and enter a minimum communication interval. 

In order to access these settings, log into InControl 2 and go to the group you want to address. Find the “Settings” tab at the top of the group “Dashboard” and select “InControl Options.” You’ll then be presented with the settings shown below. Simply check the box to enable “Low Data Usage Mode” and confirm the change. You may then adjust the other settings as needed. When ready, click “Save Changes” at the bottom of the page. 

Are you interested in learning more about Peplink and InControl 2 management? Contact the 5Gstore team with any questions!

How Does Peplink’s New InTouch Feature Work?

With Peplink’s new firmware version 8.2.0 comes a new feature that has been long awaited by many users, including our team. That feature is called “InTouch” and it allows folks to access IP based devices that sit behind their Peplink router. It works by leveraging SpeedFusion Cloud, which means you must have an active SpeedFusion Cloud connection. 

We wanted to test this out to see how well it works. Outlined below are instructions. In our example, we are accessing our Remote Power IP Switch, model UIS-622b. This device helps to monitor our router’s WAN connection as well as local devices on the network. If the Internet connection fails, or a device drops its connection to the network, a reset to the router or other device’s power is triggered. This usually resolves the connection issue. 

  1. Log into your InControl2 account at https://incontrol2.peplink.com
  2. Select the Organization, then Group of the router you want to access devices behind
  3. Click on the router device from the group to open the Device Details page
  4. Hover over the Settings tab and select InTouch
  1. From this page you’ll add devices you want to access. Click Add
  1. Enter a name for the device and its local IP address – you can obtain this from the cloud app or Cloud4UIS.com for your Switch OR you can typically find this from your router’s client list. 
  2. Click OK 
  1. Click Save Changes on the next screen
  1. Now that we’ve added our device, we can access it from the Device Details page or Group Overview page. 
  1. Shown here is the Device Details page. Note the new InTouch button. 
  1. We’ll click here to select the IP Switch we just added. 
  1. A new page will open and we’ll be connected to the web administration page of the IP Switch.