Why Isn’t 5G Home Internet Available Where My Phone Has 5G Service?

The promise of 5G is its revolutionary speed and connectivity, so it can be frustrating to have 5G service on your phone but find that 5G Home Internet isn’t available at your address. A representative at CNET experienced this firsthand, noting that their iPhone’s 5G connection outperformed their 5G Home hub. Why might this be?

Spectrum Allocation Priorities

The key to understanding this discrepancy lies in how network operators allocate their resources. A Verizon spokesperson explained that their network is primarily designed with mobile customers in mind. They allocate spectrum to ensure the highest reliability for mobile users, which means that home internet services can only be offered when there’s excess capacity. “We continue to allocate spectrum to ensure our mobile customers have the reliability they’ve come to expect from Verizon,” they said via email. “As we deploy more spectrum — in excess of what our models show we need for the highest reliability for our mobile customers — we are able to offer 5G Home service as well.”

Different 5G Frequencies

5G technology encompasses three primary frequency types: Sub-6, C-band, and mmWave. Each type has different characteristics that impact signal strength and coverage. Each 5G device may only support a short range of frequencies. For example, your phone may only support low-band, Sub-6 frequencies whereas your Home Internet supports all 5G frequencies – low, mid, and high-band. 

  • Sub-6 (FR1): These low-band frequencies, predominantly below 2GHz, were initially used for 5G due to their existing use in 4G/LTE and 3G networks. This made it easier for carriers like AT&T and T-Mobile to quickly roll out 5G on these frequencies. Sub-6 covers the most distance, making it the most widely available 5G in the U.S., but it often provides speeds similar to LTE.
  • C-band (mid-band): Covering 4GHz to 8GHz, particularly the 3.7 to 4.2GHz range, C-band offers a better 5G experience than Sub-6 but does not cover as much distance. C-band strikes a balance between coverage and performance, offering faster speeds and better capacity than Sub-6.
  • mmWave (FR2): These high frequencies, over 24GHz, provide the fastest speeds, lowest latency, and highest reliability, representing the true potential of 5G. However, its coverage range is limited compared to Sub-6 and C-band. mmWave is ideal for densely populated urban areas where the demand for high-speed connectivity is greatest.

Capacity Management

The issue is further compounded by the way carriers manage their network capacity. T-Mobile’s director of geospatial engineering and analytics, Kendra Lord, likened 5G home internet availability to the number of seats on a plane. “It’s not only the number of households that we believe could get [T-Mobile Home Internet],” she said, “but how many within a given sector we could say yes to.”

A T-Mobile spokesperson echoed this sentiment in an email to CNET. “Our fixed wireless Home Internet runs on the extra capacity on our wireless network. In some areas, we have extra capacity on the network, but in others, we don’t. So, we allocate access to Home Internet on a sector-by-sector, home-by-home basis.”

Sector-Based Availability

This sector-based allocation means that even if your mobile device gets 5G service, your home might not qualify for 5G Home Internet. It’s entirely possible for one household to have access to T-Mobile Home Internet while the neighboring house does not, all due to the capacity limits within the specific sector of the cellular network.

A Dynamic Process

Both Verizon and T-Mobile are constantly optimizing their networks, prioritizing mobile connectivity and adapting home internet offerings based on available capacity. This dynamic process means that availability can change from month to month.

What This Means for Consumers

For consumers considering a switch from traditional cable broadband to 5G Home Internet, it’s essential to recognize that the availability of 5G mobile service does not guarantee the availability of 5G Home Internet. Checking the current status of your address with your service provider and understanding that this status might change over time is crucial.

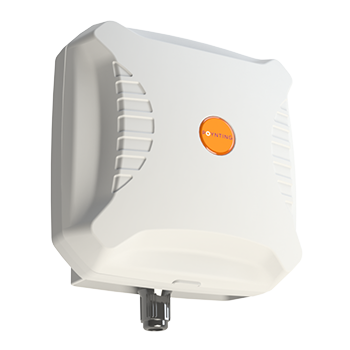
5G Home Internet from 5Gstore.com

For those looking to explore 5G Home Internet options, 5Gstore.com offers solutions through Verizon’s network. Verizon’s 5G Home Internet provides a convenient alternative to traditional broadband services, which download speeds around 100 Mbps and upload speeds around 10 Mbps. This service leverages Verizon’s 5G Ultra Wideband network to deliver high-speed internet to homes.

However, just like with other providers, availability depends on the capacity of the local network and the type of 5G spectrum being utilized. Customers can check availability at their address through 5Gstore.com. This service is a promising option for those in areas with strong Verizon 5G coverage, particularly where mmWave or C-band frequencies are in use, offering faster speeds and lower latency.

Conclusion

The reason why 5G Home Internet might not be available where your phone has 5G service boils down to several factors: network capacity management, prioritization of mobile users, and the different characteristics of 5G frequency bands. Mobile customers come first, and home internet services are rolled out based on the excess capacity within specific network sectors. This careful allocation ensures reliability and optimal performance for all users but can lead to gaps in home internet availability. By understanding these dynamics, consumers can better navigate their options and anticipate changes in service availability.

What is Massive MiMO?

The term mMIMO (Massive Multiple Input/Multiple Output) is not new, but its use has surged with the advent of 5G technology. mMIMO is an advanced form of MIMO that involves a large number of antennas, often numbering in the dozens or even exceeding 100, at the base transceiver station (BTS). Essentially, mMIMO aims to amplify the benefits of conventional MIMO on a much larger scale. It is a critical component in achieving the high performance targets set for 5G networks.

Benefits of mMIMO

mMIMO brings several significant advantages.

  1. Improved Coverage: The use of numerous antenna elements enables efficient beamforming, which can significantly enhance coverage. This technique, sometimes called 3D beamforming, manages beams both horizontally and vertically, allowing precise adjustments to suit user locations, even in areas with weak signal coverage. This results in high data rates for users regardless of their location.
  2. Higher Capacity: mMIMO supports Multi-User MIMO (MU-MIMO), allowing it to serve a large number of users simultaneously. This capability greatly enhances the overall user experience by providing higher data throughput and reducing congestion.

Deployment and Market Trends

The increasing coverage of 5G and the growing number of connected devices are driving the expansion of mMIMO deployments. According to ABI Research, global mMIMO deployments are expected to reach 32 million by 2026.

Fei Liu, a 5G & Mobile Network Infrastructure Industry Analyst at ABI Research, explains that there are two primary mMIMO configurations in use:

  • 64T64R (64 Transmit, 64 Receive): This configuration is primarily used in very dense urban areas due to its superior capacity and coverage. However, it is more energy-intensive and costly, which can impact the operators’ Return on Investment (ROI). Additionally, its size and weight present logistical challenges.
  • 32T32R (32 Transmit, 32 Receive): This setup provides sufficient capacity for urban and suburban areas. It is less expensive and consumes less energy compared to 64T64R.

Operators often deploy a mix of 64T64R and 32T32R based on specific scenario requirements. Innovations in hardware and software are expected to reduce the energy consumption, cost, weight, and size of 64T64R configurations, making them more feasible for widespread use in the future.

Regional Deployment Variations

There are notable regional differences in mMIMO deployments:

  • United States: Actively deploying 64T64R to cater to densely populated urban areas.
  • Japan, South Korea, and Europe: Favoring 32T32R configurations for their urban and suburban needs.
  • China: Initially adopted 64T64R, but has shifted towards 32T32R post-2021. Despite this, 64T64R is anticipated to become more prevalent in the next few years.

The Asia-Pacific region is expected to lead the 5G mMIMO market due to the significant adoption of 5G technology in China, Japan, and South Korea.

In conclusion, mMIMO is a pivotal technology in the 5G era, offering enhanced coverage and capacity. Its deployment strategies vary by region, but ongoing advancements are poised to make high-capacity configurations more practical and widespread, shaping the future of mobile communications.

Utilizing Peplink QoS Bandwidth User Groups

Peplink MAX routers allow you to configure 3 user groups with independent upload and download limits. The groups are named “Manager,” “Staff,” and “Guest.” While these names are fixed, you can assign any devices on your network to these groups. The “Manager” group has no bandwidth limits, providing full access to total bandwidth, whereas the “Staff” and “Guest” groups can be configured to limit bandwidth usage.

Using bandwidth groups helps control the amount of bandwidth certain devices consume, ensuring that a few devices don’t use up all available bandwidth. This is especially useful for limiting high-bandwidth applications, like streaming services. For instance, Netflix can use 20-30 Mbps for 4K videos, but can also stream well at 5 Mbps for standard definition videos. By capping the bandwidth for Netflix, you can prevent 4K streaming and reduce your cellular bandwidth usage, cutting down on monthly costs.

Step 1 – Set Up Bandwidth Group Limits

First, decide on the bandwidth limits for each group. You might want to create one group with moderate limits and another with stricter limits. Note that setting less than 3 Mbps download and 1 Mbps upload may affect general usability.

To set bandwidth limits:

  • Access the Peplink MAX admin panel at http://192.168.50.1.
  • Go to the “Advanced” tab, then the “QoS” section, and select “Bandwidth Control.”
  • In the “Individual Bandwidth Limit” section, check “enable.”
  • Enter the download and upload limits for each group.
  • Click “save,” then “Apply Changes” to finalize.

Step 2 – Assign Devices to Bandwidth Groups

You can add devices to bandwidth groups in three ways:

Method 1: Assign Individual Devices by IP Address

  • Identify the device’s IP address from the “Client List” under the “Status” tab.
  • Click the “tag” icon to create a DHCP Reservation, ensuring the device always uses the same IP address. You’ll need to click “Save” at the bottom of the DHCP reservation window, then “Apply Changes” at the top right.
  • Navigate to the “Advanced” tab, then “User Groups.”
  • Click “New Rule,” enter the device’s IP address, and select the desired bandwidth group. The “Manager” group bypasses all limits.
  • Click “Save,” then “Apply Changes.” You should then see your rule listed with the default ones, like shown below.

Method 2: Assign Network VLAN Segments & Set WiFi Access

  • Create a new VLAN by going to the “Network” tab and clicking “New LAN.”
  • Set up the network with the following settings:
    • IP Address: 192.168.10.1
    • Name: Give this a unique name to identify it easily
    • VLAN ID: 2 (this must be different than any other LANs)
    • IP Range: Set a range of addresses that will be made available for your devices to establish a connection to the network
  • Click “Save” and then “Apply Changes.”
  • Navigate to the “AP” tab
  • Create a new wireless network by clicking on “New SSID” – this will be linked to the VLAN created earlier:
    • SSID: Name the WiFi network for users to connect to
    • VLAN: Select the VLAN you created earlier.
    • Security policy: We recommend setting this to WPA2 Personal or WPA2/WPA3 Personal
    • Shared key: This is your WiFi password, which needs to be at least 8 characters
  • Click “Save,” then ”Apply Changes”

To assign the VLAN to a user group:

  • Go to the “Advanced” tab, then “User Groups.”
  • Click “New Rule” and select “Group by Subnet.”
  • Enter the subnet, ensuring it ends in 0 to cover the entire network.
  • When done, click  “Save,” then “Apply Changes”

Method 3: Using Client Type

You can also group devices by type, such as printers, to restrict their bandwidth usage.

  • Navigate to the “Advanced” tab, then “User Groups.”
  • Click “New Rule,” and set the “Grouped by” field to “Client Type” and select the desired type. 
  • Set the desired “User Group” this should apply to.
  • Click “Save,” then “Apply Changes.”

Step 3 – Test Bandwidth Group

Wait 60 seconds for the router to reboot. Connect devices to the new WiFi network and test to ensure the bandwidth limits are applied. Repeat the process to create additional networks and assign them to different bandwidth groups as needed.

Conclusion 

By leveraging the bandwidth user group features on Peplink MAX routers, you can efficiently manage and optimize your network’s bandwidth usage. Configuring these groups allows you to prioritize essential devices and applications while restricting high-bandwidth activities to prevent network congestion. This approach not only enhances overall network performance but also helps reduce unnecessary data consumption, leading to cost savings. Whether you are setting up limits for individual devices, entire VLAN segments, or specific client types, these methods provide flexibility and control to meet your unique network needs. Implementing these strategies ensures a balanced and efficient use of your network resources, contributing to a smoother and more reliable internet experience for all users.

Bonding Throughput: What to Expect

When it comes to networking, achieving high speeds and unwavering reliability for WAN connections is important to any business or power user. Bonding, a process that merges multiple internet connections into a unified, robust link, stands as a solution to this demand. Noteworthy among bonding technologies are Peplink SpeedFusion Bonding and Digi WAN Bonding, both renowned for their prowess in optimizing network performance.

Understanding Bonding Throughput

Throughput, in networking, refers to the rate of successful data transmission over a communication channel. In the realm of bonding, throughput hinges not only on individual connection speeds and reliability but also on the capabilities of the bonding router. Typically, the router’s throughput is going to be much higher than the bonded throughput. In any case though, the higher the router throughput, the higher the bonded throughput. 

Peplink SpeedFusion Bonding

Peplink SpeedFusion harnesses patented technology to aggregate multiple WAN connections, morphing them into a single, high-performing bonded connection. This technology boasts three distinct features:

  1. SpeedFusion Hot Failover: In the event of a WAN disconnection, Hot Failover seamlessly transfers traffic to another connection while maintaining session persistence. This ensures uninterrupted operations even amidst connection hiccups.
  2. SpeedFusion WAN Smoothing: Intelligent algorithms optimize connectivity by mitigating latency and minimizing the impact of packet loss. This works by using multiple WAN connections to send duplicate packets so that in the event that one WAN drops a packet, another picks it up. Be aware that this will create more data usage across your connections. WAN Smoothing is ideal for scenarios requiring reliability and responsiveness over sheer speed. For example, video meetings and voice calls have a much smoother connection.
    • If you need to enable WAN Smoothing, find the ‘WAN Smoothing’ field within your SpeedFusion VPN profile configuration. This can be set to Normal (The total bandwidth consumption will be at most 2x of the original data traffic), Medium (3x the original traffic), High (4x the original traffic), and Maximum (The total bandwidth consumption depends on the number of connected active wan-to-wan connection). 
  1. SpeedFusion Bandwidth Bonding: By combining data at the packet level, Bandwidth Bonding enables the aggregation of speeds from multiple connections, enhancing throughput significantly. This is particularly advantageous in bandwidth-constrained environments or when establishing connections between branch offices and headquarters. Throughput support is up to 4 Gbps with some models, but as low as 40 Mbps with others. 

It should also be noted that there are different plans available to users that allow for a certain amount of bandwidth to be reached. This means even if your hardware is capable of supporting 1 Gbps over SpeedFusion, you may still be limited to below that amount. For example, if using Peplink’s SpeedFusion Connect (SF Connect) service plan that comes with your device’s warranty, you will only be able to achieve a max of 200 Mbps. However, if you opt for a different SF Connect plan, you may be able to achieve up to 400 Mbps. This is with plans that provide unlimited data usage for a specific period of time. 

If neither of these options is sufficient to you, look at using Peplink’s FusionHub virtual appliance instead. This allows you to host your own SpeedFusion server on a cloud platform such as AWS or Microsoft Azure. You may also consider using another Peplink router at a site where you have access to a reliable, high-speed internet connection. As long as the bandwidth speed provided from the cloud or your personal Internet connection is faster than the speed your other Peplink is capable of supporting, you can set up a point to point connection between the routers. In either case, you are then able to obtain the full bandwidth the hardware is capable of supporting.

Digi WAN Bonding

Digi WAN Bonding leverages the power of Bondix Simple Aggregation of Networks (S.A.NE), combining multiple WAN links to boost throughput and maintain connection resilience. Key features include:

  1. Hot failover: Ensures continuous connectivity with zero packet loss or failover wait time.
  2. WAN aggregation: Combines multiple WAN links for enhanced speed and bandwidth, capable of achieving between 100 Mbps and 1 Gbps.
  3. Packet Duplication (WAN Smoothing): Minimizes latency and jitter by transmitting data through multiple channels simultaneously. Packets are replicated across multiple WAN links to safeguard the delivery of critical data. This allows packets to be received regardless of the WAN that sends them. If one WAN fails, the packets are received via another active channel.
    • To enable this for your configuration, simply go into the device’s configuration settings and navigate to the ‘Network’ -> ‘SD-WAN’ -> ‘WAN Bonding’ section. Find ‘Mode’ and set this to ‘Packet Duplication.’ When ready, click ‘Apply’ at the top right to save the configuration. 
  1. WAN prioritization: Automatically selects or allows manual configuration of the most optimal active WAN link, ensuring efficient traffic balancing.
  2. Simple integration: Facilitates easy deployment across diverse environments via Digi Remote Manager® (Digi RM).

Depending on the router model, Digi WAN Bonding offers varying throughput capacities. For instance, a Digi TX64 with three 200Mbps connections (Ethernet WAN + 2 cellular connections) can ensure up to 480Mbps bonded throughput.

Factors Influencing Throughput

Achieving optimal bonding throughput relies on a nuanced understanding of various influencing factors. Firstly, the number and types of WAN connections play a pivotal role. Diverse connections, such as DSL, cable, fiber, and cellular, each exhibit distinct characteristics in terms of speed, latency, and reliability. Consequently, selecting a combination of connections with complementary attributes can significantly impact overall throughput.

Moreover, cellular network congestion poses a formidable challenge to bonding throughput. During peak usage times or in densely populated areas, network congestion can lead to reduced speeds and increased latency, affecting the performance of bonded connections. Implementing congestion management techniques, such as Quality of Service (QoS) policies or traffic shaping, can mitigate these effects and maintain consistent throughput levels.

Router processing power constitutes another critical factor. Bonding routers must possess sufficient computational capabilities to handle the aggregation, segmentation, and reassembly of data packets across multiple connections efficiently. Inadequate processing power can bottleneck throughput and limit the effectiveness of bonding technology, especially in high-demand environments or when dealing with large volumes of data traffic.

Additionally, configuration settings play a crucial role in optimizing bonding throughput. Fine-tuning parameters such as load balancing algorithms and failover thresholds can significantly impact the efficiency and stability of bonded connections. By customizing these settings according to the specific requirements and characteristics of the network environment, users can maximize throughput while ensuring robustness and reliability.

Considerations for Users

When evaluating bonding solutions, users must carefully consider a range of factors to ensure the selection of a solution that aligns with their unique requirements and objectives. Firstly, desired throughput stands as a primary consideration. Different applications and use cases demand varying levels of bandwidth and speed. Whether the goal is to support high-definition video streaming, real-time communication, or large-scale data transfers, users must assess the bonding solution’s capacity to deliver the required throughput without compromising performance or reliability.

Budgetary considerations also play a significant role. Bonding solutions encompass a spectrum of costs, ranging from affordable consumer-grade options to enterprise-grade solutions with advanced features and scalability. Users must balance their budgetary constraints with the need for robustness, scalability, and long-term viability when selecting a bonding solution.

Scalability and future-proofing represent additional considerations. As businesses grow and network requirements evolve, bonding solutions must be capable of accommodating increasing bandwidth demands, additional connections, and emerging technologies. Choosing a solution that offers scalability through modular hardware, software upgrades, or flexible licensing models ensures long-term viability and minimizes the need for costly replacements or upgrades.

Compatibility with existing infrastructure is also paramount. Bonding solutions should seamlessly integrate with existing network components, protocols, and management systems to facilitate smooth deployment and operation. Compatibility considerations extend beyond technical interoperability to encompass factors such as ease of configuration, centralized management capabilities, and support for industry standards and protocols.

Lastly, support and maintenance considerations are crucial. Users should assess the availability of technical support, software updates, and maintenance services offered by bonding solution providers. Access to timely support, documentation, and firmware updates ensures ongoing reliability, security, and performance optimization of bonded connections.

By carefully evaluating these factors and conducting thorough research and testing, users can make informed decisions when selecting a bonding solution that meets their specific networking requirements, budget constraints, and long-term objectives.

Increase Cellular Performance with Poynting EPNT-2 Antenna Enclosure

Cellular signal performance is key for anyone running their home or business off a fixed wireless Internet connection. Reliable network functionality is a must. Whether it’s seamless data transmission, crystal-clear voice calls, or uninterrupted internet access, the quality of cellular signals profoundly influences the user experience. The Poynting EPNT-2 antenna enclosure offers enhanced connectivity with a suite of features designed to optimize cellular performance across diverse applications and environments.

Understanding Cellular Performance

The efficiency of cellular devices, especially embedded cellular modems, hinges on several critical factors: signal quality, loss, and interference. These elements directly impact a device’s capability to establish and sustain a stable connection to the network, thereby influencing data transmission speeds, call quality, and overall network reliability. Consequently, a deep understanding of cellular performance is helpful in ensuring the seamless operation of devices across various scenarios.

Key Features

The Poynting EPNT-2 embodies a fusion of cutting-edge technology and meticulous design, manifesting in a range of features geared towards elevating cellular performance:

  1. Antenna Enclosure with High-Performance Antennas: The EPNT-2 integrates advanced metamaterial technology within its enclosure, housing high-performance antennas engineered to deliver exceptional signal reception.
  2. Comprehensive Band Coverage: With support for the main 4G/5G bands, spanning from 617 to 960 MHz and 1710 to 4200 MHz, the EPNT-2 ensures broad compatibility and reliable connectivity across diverse frequency ranges.
  3. MIMO Technology: Equipped with 4×4 MIMO cellular functionality, the EPNT-2 maximizes data throughput and network efficiency, facilitating faster and more robust connections.
  4. Dual-Band Wi-Fi Support: In addition to cellular connectivity, the EPNT-2 features 2×2 MIMO dual-band 2.4 GHz and 5 GHz Wi-Fi antennas, further enhancing its versatility and utility in various networking scenarios.
  5. Weather-Resistant Design: Constructed with a weather, dust, and vandal-resistant enclosure boasting an IP-65 rating, the EPNT-2 ensures durability and reliability even in harsh environmental conditions.
  6. Cross-Polarized Antennas: Leveraging cross-polarized antennas, the EPNT-2 delivers improved performance by mitigating interference and enhancing signal clarity.
  7. High Gain: With an impressive 11 dBi gain, the EPNT-2 amplifies signal strength, extending the reach and effectiveness of cellular connections.

Versatility and Adaptability

One of the hallmark features of the EPNT-2 is its adaptability to diverse router modules, effectively transforming the antenna enclosure into Customer Premises Equipment (CPE). This flexibility allows users to seamlessly integrate their preferred 4G/5G routers, catering to specific network requirements and preferences. The enclosure accommodates routers of dimensions up to 185 x 145 x 45 mm³, ensuring compatibility with a wide range of devices.

Applications and Industries

The versatility and robust performance of the EPNT-2 render it indispensable across various industries and applications, including:

  • Commercial, industrial, residential, and urban settings where reliable LTE/5G reception is imperative.
  • Network operators offering Fixed Wireless Access (FWA) solutions.
  • Smart environmental monitoring, water systems, utilities, farming, agricultural, and IoT applications.
  • Communication systems in oil and gas, municipal, and government sectors.
  • Repeaters and coverage enhancement amplifiers, augmenting network reach and reliability.

Is the EPNT-2 Right for You?

If you’re trying to cut down on cable loss and interference and maximize on performance, the Poynting EPNT-2 antenna enclosure emerges as a solution. With its innovative design, comprehensive features, and robust construction, the EPNT-2 sets a new standard for seamless connectivity across diverse applications and environments. Whether deployed in urban landscapes or remote industrial sites, the EPNT-2 ensures optimal network performance, empowering users to stay connected, informed, and productive, regardless of their location or connectivity challenges.

Enhancing the Performance of Your Inseego 5G Indoor Router

Having a robust and reliable internet connection in this day and age is essential for anyone.  The Inseego 5G indoor router series, featuring models like the FG2000e, FX2000e, and S2000e, promises lightning-fast internet speeds for your home or office. However, ensuring optimal signal strength, especially indoors or in areas with poor network coverage, can be a challenge. In this article, we’ll explore effective strategies to boost the signal on your Inseego router, ensuring seamless connectivity for all your online activities.

Option #1: Optimizing Inseego Placement

Begin by optimizing the placement of your Inseego router within your premises. Utilize the Inseego GO app installer mode to conduct a mini site survey, comparing signal strengths and data speeds across various locations. Pay particular attention to areas near windows or where the signal appears strongest. 

To access the signal strength information on your Inseego router, follow these steps:

  1. Connect to your Inseego router using a web browser at 192.168.1.1
  2. Log in with your Inseego admin credentials
  3. Navigate to the connection status to view the signal strength, represented by a negative value. A value closer to 0 indicates a stronger signal – for more information on interpreting your signal strength check out our article, Understanding RSSI, RSRP, and RSRQ

Select the location with the fastest data speeds and stable signal for optimal router placement. This simple yet effective process can significantly improve your router’s performance.

Option #2: Utilizing MIMO External Antennas

If achieving optimal signal strength indoors proves challenging, consider deploying a MIMO external antenna. Directional antennas, when positioned outside and directed towards the nearest cell tower, can amplify signal reception and enhance bandwidth speeds. A tool like the OpenSignal app can help to identify nearby cell towers and their directions. 

Should you find that you have too many obstructions around your area or multiple cell towers in the vicinity that serve your location (you can check this with your carrier), you can use an omnidirectional antenna instead. These will pull in signals from 360 degrees around. 

For the FX2000 and FG2000 series, it’s essential to understand that the ports operate on C-band/n77 (3300MHz to 4200MHz). This frequency range is particularly beneficial for users of Verizon Wireless or AT&T services, as both networks utilize 5G NSA technology, where LTE is still employed for authentication and control channels. 

While a strong LTE signal is not necessary, sufficient signal strength must be present at the router’s location. Conduct a site survey, especially in areas with challenging RF conditions, to determine the ideal antenna placement.

For the S2000e model, there are no band limitations, providing greater flexibility in antenna selection.

Explore external antennas for your Inseego 5G indoor router!

Option #3: Deploying Wireless Repeater Systems

For broader coverage and simultaneous signal boosting across multiple devices, such as your Inseego and your cell phones, consider implementing a wireless repeater system. These systems amplify signals wirelessly, eliminating the need for direct cable connections.

Ensure compatibility with your Inseego router and conduct signal strength checks across your premises to identify the optimal placement for the external antenna. By enhancing signal strength and stability, a wireless repeater system can facilitate faster download and upload speeds, seamless streaming, and smoother browsing experiences.

Here are just a couple popular solutions for home and office use: 

Use the 5Gstore signal booster guide to find more solutions, or give us a call!

Conclusion

Maximizing signal strength and optimizing connectivity for your Inseego 5G indoor router is essential for uninterrupted internet access. By following the strategies outlined in this article, including optimizing router placement, utilizing external antennas, and deploying wireless repeater systems, you can ensure a reliable and high-performing internet connection for your home or office. Stay connected, stay productive, and enjoy the benefits of blazing-fast 5G internet with your Inseego router.If you still have questions, or need assistance determining the best option for your usage, contact the team at 5Gstore today!

Peplink InControl 2 Version 2.13.2: A Leap Forward in Cloud Management

We’re thrilled to announce the release of Peplink InControl 2 Version 2.13.2, marking another significant step in our journey to empower businesses with robust networking solutions. As the backbone of Peplink’s cloud-based management platform, InControl 2 continues to evolve, offering enhanced capabilities and features to streamline network management and optimize performance.

Release Dates:

  • Venus: April 16, 2024
  • Mars: May 6, 2024
  • Earth: May 13, 2024

What’s New:

  1. Configuration Management: Say hello to seamless device configuration transfer! With support for applying a device configuration to another device of the same or different model, managing configurations has never been easier. Simply navigate to Device Details > Show All > Configuration Backups to explore this feature. (Note: Currently supported for Balance and MAX models with no FlexModules slot.)
  2. Bulk eSIM Activation: Streamline your operations with the ability to bulk activate eSIMs on multiple devices. Find this functionality conveniently located in the Actions menu on the Device Management screen.
  3. Enhanced Device Insights: Dive deeper into device details with the display of eSIM EID on the device details and device management screens. Additionally, devices are now searchable by EID on the device management and user organizations screen.
  4. Cellular Module Firmware Upgrade: Ensure your devices stay up-to-date even when offline. The cellular module firmware can now be upgraded on the next startup if the device is offline.
  5. Expanded Device Support: Enjoy added support for switching Peplink eSIM, BYO eSIM, remote SIM, and FusionSIM, along with indicators at device and SIM levels for better management.
  6. Improved SpeedFusion VPN Configuration: From static IP selection to enhanced LAN settings and bandwidth control, our SpeedFusion VPN configuration now offers greater flexibility and control.
  7. Captive Portal Enhancements: Take advantage of new features like quota reset time for guest accounts and “Cache Website Server Name” setting to further customize your captive portal experience.
  8. And Much More: Explore additional enhancements, including support for Docker management, device track history, and improved firmware display during reboot.

Have questions about using InControl 2 cloud management? Check with the team at 5Gstore.com for assistance today!

Verizon Expands Private 5G Network Offerings with Nokia Partnership

In a recent announcement, Verizon reports having achieved a significant milestone in its quest for innovation. The completion of the first phase of certification to integrate Nokia Digital Automation Cloud (DAC) into its spectrum of supported offerings marks a pivotal moment in advancing private network solutions for businesses across various industries.

This strategic move adds a new dimension to Verizon Business’ Private 5G Network offering, enriching its hardware and software options for customers. The incorporation of Nokia DAC not only enhances Verizon’s portfolio but also amplifies its commitment to delivering cutting-edge solutions for enterprise connectivity.

Verizon Private 5G Networks stand out for their agility, ensuring on-premises data traffic remains secure and separate from public networks. These networks offer a slew of advantages, including superior security compared to WiFi, high reliability, exceptional performance with low latency, scalability, and customization to meet specific business requirements. Verizon’s managed services, including network monitoring and support, further bolster businesses’ competitiveness and efficiency.

Praveen Atreya, Vice President of Technology and Planning at Verizon, emphasized the significance of Private Wireless Networks in driving digital transformation for modern enterprises. He reiterated Verizon’s dedication to developing innovative offerings that empower customers to achieve efficiency and profitability.

The integration of Nokia DAC brings forth a host of capabilities tailored for various industries such as manufacturing, logistics, utilities, and agriculture. By combining 4.9G/LTE and 5G connectivity with mission-critical industrial edge technology, Nokia DAC enables real-time applications for smart manufacturing, predictive maintenance, and remote operations, among others.

David de Lancellotti, Vice President of Enterprise Campus Edge Business at Nokia, expressed excitement about expanding the partnership with Verizon. Leveraging Nokia DAC’s private wireless and digitalization platform, the collaboration aims to accelerate the adoption of 5G and industry 4.0 transformations, driving strategic growth for both companies.

Verizon’s certification of Nokia DAC underscores the carrier’s commitment to offering diversified private network solutions. This move comes at a time when Verizon is expanding its private network plans, with a focus on licensed spectrum-based offerings. The utilization of Nokia’s DAC platform opens up new avenues for Verizon to cater to evolving business needs, complementing its existing partnerships and initiatives in the private network space.

As Verizon continues to make strides in the private network arena, fueled by its licensed spectrum advantage, the stage is set for further growth and innovation. With a growing demand for private network solutions, fueled by the ongoing 5G revolution, Verizon is poised to play a significant role in shaping the future of enterprise connectivity.

Nokia’s expanding presence in the private network market, coupled with its innovative offerings, further solidifies its position as a key player in the industry. With a robust portfolio and a focus on driving digital transformation across diverse sectors, Nokia remains poised for continued growth and success in the evolving landscape of private wireless networks.

Your Ultimate Guide to Starlink Support

We’re thrilled to introduce our latest resource to help you maximize your Starlink experience: the comprehensive Starlink Support PDF from 5Gstore. Best of all, it’s completely free for everyone!

What can you expect from this 35-page guide? Here’s a sneak peek:

  1. Real-World Tips: Gathered from actual Starlink users, these tips will help you make the most of your satellite internet connection.
  2. Gen 3 Starlink Dish Usage: Get specific details and guidance on using the latest Gen 3 Starlink Dish for optimal performance.
  3. Troubleshooting Made Easy: Encounter a problem or see an alert on your Starlink app? Our guide provides detailed troubleshooting steps to help you quickly resolve issues and get back online.
  4. Advanced Features and Support: Explore advanced features of Starlink and learn how to leverage them for a smoother experience. Plus, discover how 5Gstore’s advanced services can assist you with connecting your Starlink to your Peplink or Digi router and set up SpeedFusion (Peplink) or WAN Bonding (Digi).

Whether you’re a seasoned Starlink user or just getting started, this guide has something for everyone. Say goodbye to connectivity frustrations and hello to seamless internet browsing with Starlink.

Ready to dive in? Access the 5Gstore Starlink Support PDF and explore all the invaluable insights it has to offer. Find it conveniently located on the 5Gstore.com website.

Empower yourself with knowledge and take control of your Starlink experience today!

The Importance of Saving Your Router’s Configuration

The humble router. It’s that little box in your home or office that connects you to the vast world of the internet. But how often do we think about it until something goes wrong? Whether you’re a tech wizard or just someone who wants a smooth internet experience, understanding why it’s important to save your router’s configuration can save you from headaches down the line.

Picture this: the team at 5Gstore is like the superheroes of router troubleshooting. They’re always testing and fixing routers, and sometimes they have to reset them back to square one. But here’s their secret weapon: they don’t waste time reconfiguring everything manually. Instead, they use something called a configuration file.

A configuration file is like a snapshot of your router’s settings at a specific moment in time. It holds everything from your WiFi name and password to your security settings. So when things go haywire, you can just upload this file and voila! Your router is back to normal in no time. It’s not only a time-saver but also ensures that all your devices stay connected seamlessly, whether you’re at home or running a business.

But why should everyday folks bother with this? Well, think about those pesky firmware updates your router occasionally asks you to install. Sure, they promise better performance and security, but what if something goes wrong? Without a backup of your configuration, you might end up spending hours reconfiguring everything or, even worse, losing important data.

Plus, saving a fresh copy of your configuration after each update acts as a safety net. If you ever run into trouble afterward, you can easily revert to a previous setup and troubleshoot without pulling your hair out.

This practice becomes even more crucial as technology keeps evolving. Months or years down the line, when you’re scratching your head over why your WiFi suddenly stopped working, having that saved configuration file will be a lifesaver. Instead of trying to remember settings from ages ago, a quick upload will bring your router back to its former glory.

So, saving your router’s configuration is like giving yourself a safety net for your digital life. It lets you navigate the ever-changing world of technology with confidence, knowing that your network settings are safe and sound. Whether you’re a tech guru or just someone who loves binge-watching Netflix, remember: a little preparation goes a long way when it comes to routers.

If you’re ready to backup your configuration file today, and you have a router from Cradlepoint, Digi, Inseego, Peplink, or Sierra Wireless, check out the step-by-step instructions we have available below!

Cradlepoint

  1. Connect via Ethernet LAN port or WiFi to your router
  2. Log into its web admin console – the default address is 192.168.0.1 – with your admin credentials
  3. Navigate to the ‘System’ tab -> ‘System Control’ -> ‘NetCloud OS’
  4. Refer to the ‘System Config Save’ section here and click ‘Download Settings’
  5. Save this file somewhere you can easily access it when needed.
  6. You may follow these same steps to upload your configuration file by clicking the ‘Restore Settings’ button here. 

Digi

  1. Connect via Ethernet LAN port or WiFi to your router
  2. Log into its web admin console – the default address is 192.168.2.1 – with your admin credentials
  3. Navigate to the System tab and under ‘Configuration,’ select ‘Configuration Maintenance.’
  4. Refer to the ‘Configuration backup’ section
  5. Enter your device’s admin password and click the ‘Save’ button
  6. Save this file somewhere you can easily access it when needed!
  7. You may follow these same steps to upload your configuration file at the ‘Configuration Restore’ section here. 

Inseego

  1. Connect via Ethernet LAN port or WiFi to your router
  2. Log into its web admin console – the default address is 192.168.1.1 – with your admin credentials
  3. Navigate to the ‘Settings’ tab on the left, then select ‘Backup and Restore’
  4. Enter your Admin password in the ‘Admin Password’ field
  5. Click the ‘Download’ button and save this file somewhere you can easily access it when needed
  6. When necessary, you can restore settings at the same page by entering the Admin password at the ‘Restore Settings’ section and then clicking ‘Restore Now’ button

Peplink

  1. Connect via Ethernet LAN port or WiFi to your router
  2. Log into its web admin console – the default address is 192.168.1.1 or 192.168.50.1 – with your admin credentials
  3. Navigate to the ‘System’ tab and select ‘Configuration’ on the left
  4. Refer to the ‘Download Active Configurations’ section and click ‘Download’
  5. Save this file somewhere you can easily access it later
  6. When needed, you can upload the configuration file at the same page under the ‘Upload Configurations’ section. 

Sierra Wireless

  1. Connect via Ethernet LAN port or WiFi to your router
  2. Log into its web admin console – the default address is https://192.168.13.31:9191 (for older devices running AceManager) or https://192.168.1.1 (for newer devices running AirLink OS) – with your admin credentials
  3. For AceManager devices: Navigate to the ‘Template’ tab and refer to the ‘Download Template’ section.  Give it a unique name and select whether or not to include passwords and device info, then click the ‘Download’ button. When needed, you can reload settings at the same Template area under ‘Apply Template’
  4. For AirLink OS devices: Click the template icon at the top right. It looks like a gray square with a checkmark, then select ‘Create template from current configuration.’ Click ‘Export to file’ at the bottom of the page and save the file. When needed, you can go back to the Template icon and select ‘Apply a template’ and this will allow you to restore from your saved file.